Feature
- For the Serial Console
- You can input commands in the serial console.
- For the emulated environment
- ARMware now can emulate the ARM architecture version 4 Instruction Set.
- Add a dynamic compiler.
- Add a threaded code optimization technology.
Brief Introduction
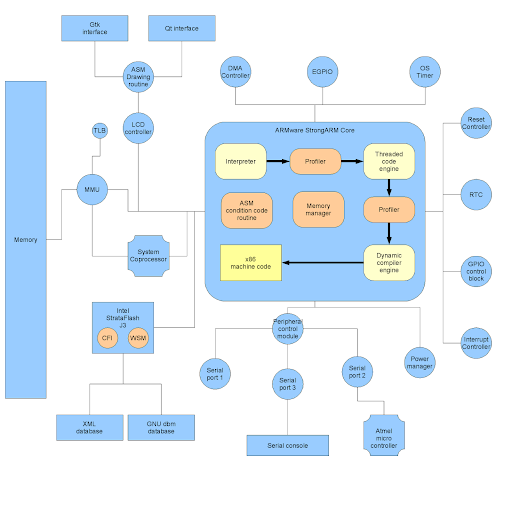
ARMware, like VMware or Bochs, is an emulator for a hardware platform. Opposite to the x86 platform which VMware or Bochs want to emulate, ARMware provides an emulation environment for the ARM platform. It can emulate Intel StrongARM SA-1110 as the core for now (The support for Intel Xscale is been developping). The whole emulated environment which ARMware provides is like HP iPaq H3600 (The future emulation environment for the Intel Xscale will be like HP iPaq H5500).
The hardware components that ARMware can emulate for now are:
- ARM architecture version 4 core
- Supports all kinds of ARM instruction set (but does not support Thumb instruction set)
- Supports all processor mode:
- User mode
- Fast Interrupt mode
- Interrupt mode
- Supervisor mode
- Abort mode
- Undefined Instruction mode
- System mode
- ARM standard system coprocessor (CP15)
- Memory Management Unit (MMU)
- Supports all kinds of address translation:
- Section translation
- Large page translation
- Small page translation
- Tiny page translation
- Supports all kinds of MMU fault:
- Translation fault
- Domain fault
- Access permission fault
- Alignemnt fault
- Supports all kinds of address translation:
- Translation Lookaside Buffer (TLB)
- In order to increase the performance, I use a hash table and fully associated TLB.
- LCD Controller
- DMA Controller
- EGPIO
- Operation System Timer
- Reset Controller
- Real Time Clock (RTC)
- GPIO Controll Block
- Interrupt Controller
- Power Management
- Supports idle mode
- Serial Port 1
- Connects to Atmel micro-controller
- Serial Port 3
- Connects to Serial console
- Intel StrataFlash J3 Flash ROM
- Fully supports Common Flash Interface (CFI)
- Fully supports Write State Machine (WSM), including
- read array
- read ID codes
- block lock
- block unlock
- read status register
- read block register
- byte/word program
- write to buffer
- block erase
- Using GNU dbm as the ROM file database
- Using XML as the ROM file database
- Atmel micro-controller
- Partially supports, including
- Get version information
- Get and Set LCD back light
- Partially supports, including
- LCD screen
- Using Qt
- Using Gtk
- Touch panel
Advantage
- ARMware has a build-in threaded code engine which will cache an EBB (extended basic block) of ARM codes, so that it can increase the execuation speed.
- Further more, ARMware has a build-in dynamic compiler which will translate an EBB of ARM codes into a block of x86 machine codes, so that it can increase the runtime preformance dramatically. The optimization technologies implemented in this dynamic compiler include:
- Redundant condition code calculation elimination
- Global grouping conditional execuating instruction
- Redundant jump elimination
- Dead code elimination
- Constant folding
- Global Common Subexpression Elimination
- Global redundany memory operation elimination
- Algebraic canonicalization
- Global SSA form based linear scan register allocation
- In addition, I use assembly codes to re-write some parts of ARMware to increase the run-time performance:
- I use MMX and SSE2 instructions to accomplish the rotation of the LCD screen of HP iPaq by an angle of 270 degrees (That is to say, you have to execute ARMware on a CPU with MMX and SSE2 instruction sets, like Pentium M or Pentium 4).
- I also use x86 assembly codes to accomplish the condition codes calculation in the ARM processor.
- ARMware has a build-in memory management subsystem to serve all memory allocation and deallocation. Through heavely testings, ARMware almost doesn’t have any memory leaks even if ARMware uses the dynamic compiler.
- It can use Qt (Screenshot) or Gtk (Screenshot) as its user interface. However, because of the liscense of Qt, I could only release the version of ARMware using Gtk as its interface.
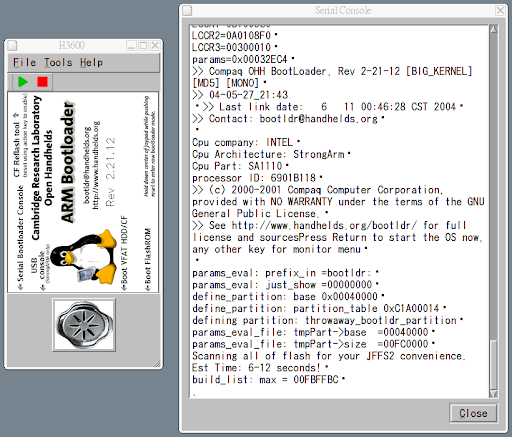
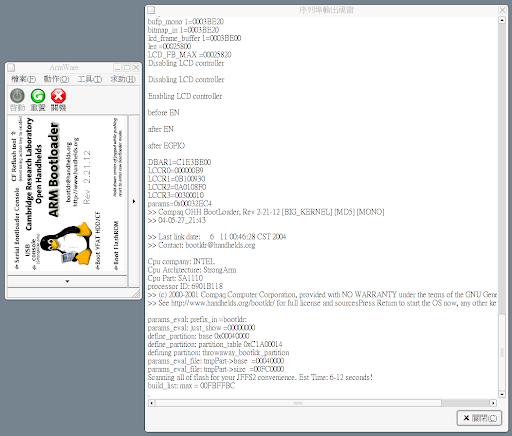
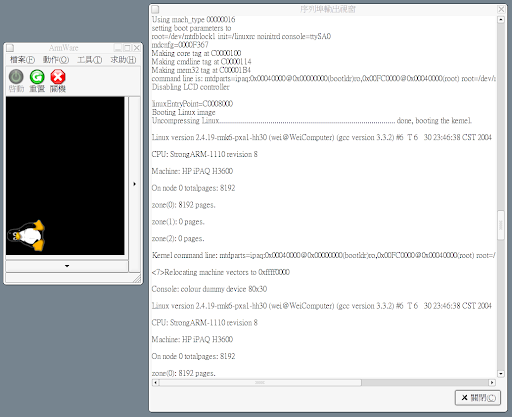
- ARMware has a serial console window (Movie), so that users can see the serial console outputs from ARMware, and input any commands into it.
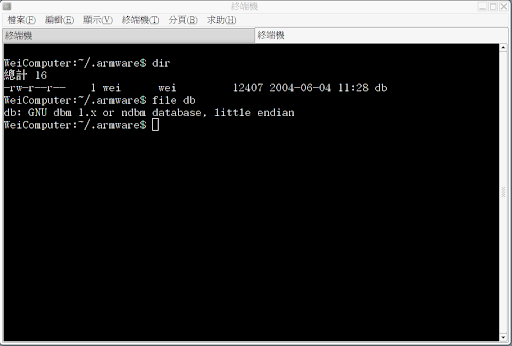
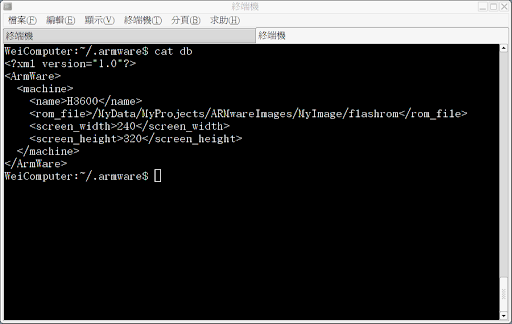
- It can use GNU dbm (Screenshot) or xml (Screenshot) as its machine database. However, because of the license of GNU dbm, I could only release the version of ARMware using xml as its machine database.
- Conform to the i18n, and ARMware includes two traditional chinese translations for the Big5 and UTF-8 locales.
- Contains a full functional utility to burn a new Flash ROM (Screenshot), which can be used to emulate the burning operations in the real world, and you can use the new created flash rom to start ARMware.
- Every user’s machine database is placed under their home directory. Thus different users can have different machine database.
Execuation flow paths
- If ARMware meets with an EBB which it didn’t execuate before, ARMware will use the build-in interpreter to interpret that block of ARM codes.
- Through the build-in profiler, ARMware will decide which block should be optimized by the build-in threaded-code engine. Then the build-in threaded-code engine will translate that EBB into threaded codes.
- If ARMware meets that threaded-coded EBB again, it will use the threaded codes to execute that block of ARM codes. In the execuating, however, if it jumps to an un-threaded-coded EBB, ARMware will fall back to the interpreter mode to interpret it.
- Again, through the build-in profiler, ARMware will further decide which block should be dynamically compiled. Then the build-in dynamic compiler will compile that block into x86 machine codes.
- If ARMware meets that dynamically-compiled EBB again, it will use the x86 machine codes to execuating that block of ARM codes. In the execuating, however, if it jumps to an un-dynamically compiled EBB, ARMware will fall back to the interpreter or threaded-code mode to execuate it.
Shortcoming
- Doesn’t support network.
- Doesn’t support audio.
Architecture Graph
Packet Content
ARMware includes a main program, several libraries, and several pictures which ARMware needs, and 2 traditional chinese translation files.
System Requirement
- Hardware: Pentium M or Pentium 4 (Because ARMware needs MMX & SSE2 instruction sets)
- Library: Because ARMware is written by the assembly lanauge and pure C++ language, and compiled by the GNU C++ Compiler 4.0. Thus, if you want to run ARMware, you will need:
- libc6 (>= 2.3.5)
- libgcc1 (>= 4.0.0)
- gtkmm (>= 2.4)
- glibmm (>= 2.4)
- libsigc++ (>= 2.0)
- libxml++ (>= 2.6)
NOTE: Because of the incompatibility between the C++ ABI of gcc-3.3 and gcc-4.0, all of the above 4 libraries (gtkmm, glibmm, libsigc++, libxml++) should be compiled by gcc-4.0 or above. (The C++ ABI of gcc-3.4 and gcc-4.0 are the same, so you can use gcc-3.4 to compile these 4 libraries, too)
As far as I know, debian stable, testing, and unstable release, and ubuntu hoary are still using gcc-3.3 as their default compiler. However, ubuntu breezy has already switched to the gcc-4.0. Thus you can get packages for these 4 libraries from the breezy directly, or you can get the source codes for these 4 libraries, and compile them by gcc-4.0.
Linux Kernel Patch
Because of the quality of the touch panel in iPaq is not good, linux kernel will discard the user input axis data at first time. However, because ARMware is a software emulator, linux kernel doesn’t need this strange behavior. Thus, I modify parts of the linux kernel source, including touch panel revising and increasing the console log level such that every kernel messages will be printed to the serial console.
If you want to execute ARMware and compile your own linux kernel, you have to download this kernel patch.
Note: This kernel patch is for kernel version 2.4.19-rmk6-pxa1-hh30.
Usage
All of the following files can be downloaded from the download area at the bottom.
- Install ARMware.
- Download bootldr.bin and root.bin, and put them into a directory.
- Execute armware.
- In the “Machine Name” window at the right hand side, press the mouse right button and select “New”.
- Enter the machine name you wanted in the “Basic Information” tab.
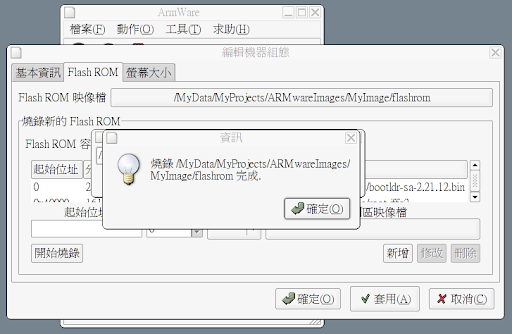
- In the “Flash ROM” tab, click the “Flash ROM Image” button to select the final ROM file you wanted. Enter 16 Mbyte in the “Flash ROM Size” field. Enter 0 in the “Starting Address” field at the bottom, and enter 256 Kbyte in the “Partition Size” field, and click “Partition Image” button to select the bootldr.bin you just downloaded. Click “Add” button. Then following the same steps to add root.bin. Its parameters are: “Starting Address”: 0x40000, “Partition Size”: 16128 Kbyte, “Partition Image”: root.bin. When you done, click “Start Burning” button at the left bottom corner to create the final ROM file you selected.
- Enter 240 as the screen width and 320 as the screen height in the “Screen Size” tab. Press “Ok” to finish the settings.
- Click the “Power On” button on the menu bar, then you can now start to execute the ARM version linux.
Screenshots
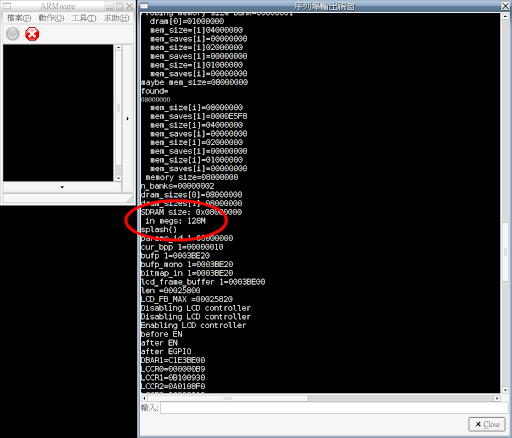
Users can modify the memory size for the emulated environment

After the DRAM size modifying, ARM linux kernel indeed detects larger memory size
Users can choose their favorite font, text color, and background color used for the serial console
The new version serial console can support the ANSI color codes
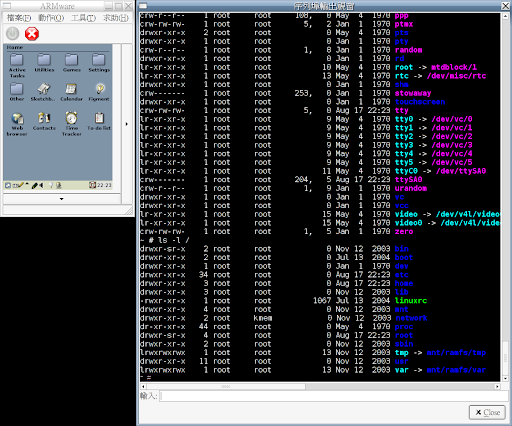
ARMware can use GNU dbm (gdbm) as its machine database
ARMware can use xml as its machine database
Using Qt as its user interface
Using Gtk as its user interface
About the designer (Gtk interface)
Configuration menu (Gtk interface)
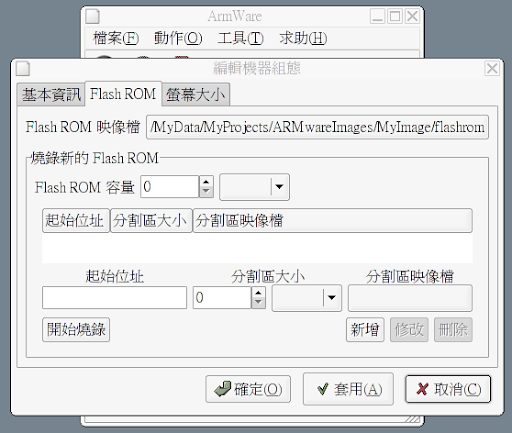
Burning Flash ROM (Gtk interface)

Burning done (Gtk interface)
Booting to boot loader (Gtk interface)
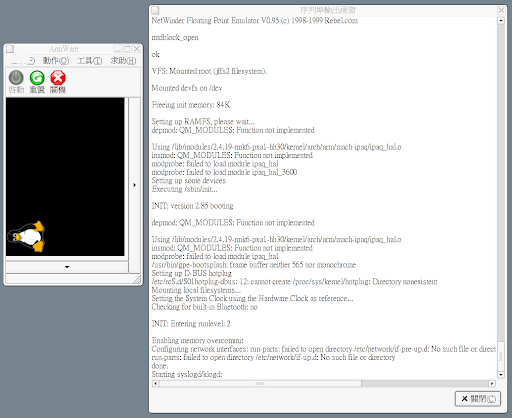
Linux kernel is loaded, and un-compressed (Gtk interface)
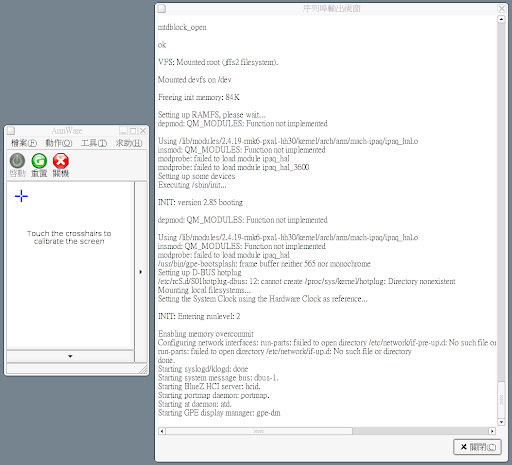
Execuating kernel, and starting to run /sbin/init (Gtk interface)
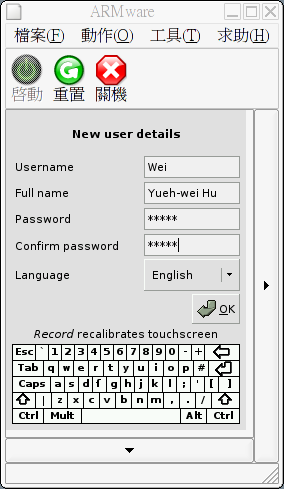
Entering GUI, calibrate touch panel (Gtk interface)
gpe initialization screen 1

gpe initialization screen 2
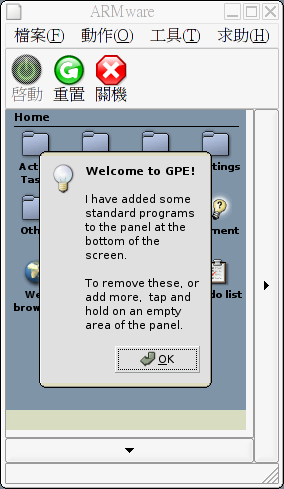
gpe welcome screen
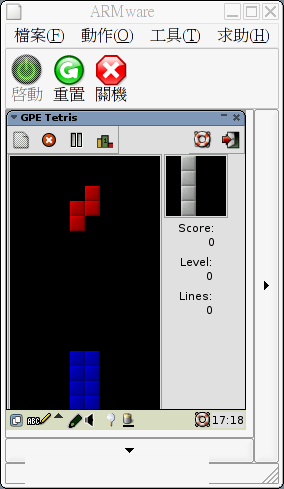
Tetris game
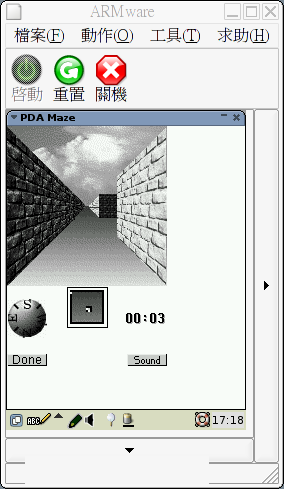
Maze game
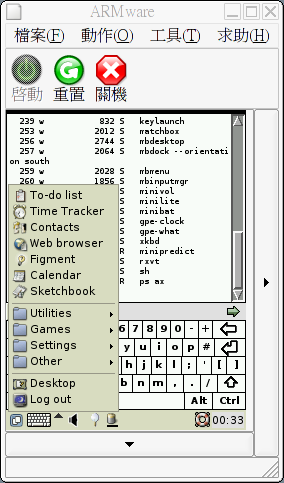
Terminal
Movies
Booting process (Enabled the threaded code engine & dynamic compiler) (divx4)
Input commands to serial console (Enable the threaded code engine & dynamic compiler) (divx4)
Calibrate the touch panel (Disabled the threaded code engine & dynamic compiler) (divx4)
Input personal information (Disabled the threaded code engine & dynamic compiler) (divx4)
Tetris game (Disabled the threaded code engine & dynamic compiler) (divx4)